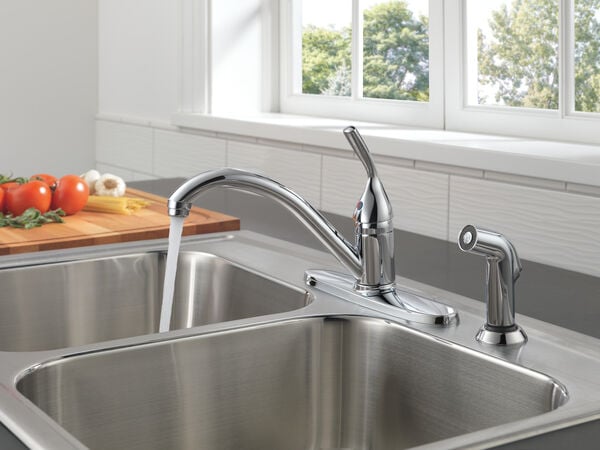
A persistent issue with a kitchen faucet that drips can prove to be quite an annoyance. Not only does it create a continuous sound of water hitting the sink, but it also results in the wastage of water, a valuable and scarce resource. However, don’t worry, for repairing a leaky faucet can be tackled as a do-it-yourself project, provided you possess some time and an understanding of your particular faucet model.
What Causes A Leaking Faucet?
You’ve asked a great question! In kitchen installations, there are four fundamental types of faucets:
- Ball Faucet: This faucet type incorporates a neoprene seal or O-ring, which might require replacement over time.
- Cartridge Faucet: Similar to the ball faucet, it also utilizes a neoprene seal or O-ring.
- Ceramic Disk Faucet: This particular faucet type also employs a neoprene seal or O-ring for its operation.
- Compression Faucet: In contrast, the compression faucet uses rubber washers to create a seal around the faucet’s valve seat.
Each of these faucet types serves a distinct purpose and understanding their mechanisms can be helpful for any kitchen DIY repairs.
Required Tools
- Needlenose pliers
- Adjustable pliers
- Utility knife
- Small-slotted Screwdriver
- Adjustable Wrench
- Hex-key wrench (ball-type faucet)
- Crescent wrench
Required Materials
- Faucet cartridge (cartridge faucet type)
- Heat-proof, non-toxic plumber’s grease or Vaseline petroleum jelly
- O-rings (depending on faucet type)
- Scouring pad
- Rags or towel
- Vinegar
- Seat washers (depending on faucet type)
How To Fix A Leaking Faucet
Let’s kick things off by outlining the fundamental steps to repair a kitchen faucet, regardless of its specific type.
Step #1: Shut the water supply
Before starting the faucet repair process, make sure to shut off the water supply valve. You can find this valve beneath your sink or alternatively, you might need to turn off the water supply for your entire home temporarily.
Step #2: Cover the drain
Taking precautionary measures is essential during the faucet repair process. It’s a smart move to use a towel or rag to cover the drain, as this will prevent any accidentally dropped parts from falling into the drainpipe. Additionally, as you remove the various components, organize them systematically on a kitchen counter or table in the order of removal. This careful arrangement will prove helpful when you’re ready to reassemble the faucet later on.
Step #3: Preparation
Prepare for the faucet repair by wrapping duct tape around the wrench jaws to safeguard surfaces from scratches while using the tool. Additionally, keep a scouring pad and vinegar nearby in case you encounter any mineral deposits that need cleaning.
Now that you’re all set to begin, take into account the type of faucet that requires repair and proceed accordingly.
Leaky Cartridge Faucet Repair
Step #1: Remove The Handle
To start, take off the cap located on the top of the handle. Next, unscrew and remove the visible screw. After that, tilt the handle backward and gently pull it to remove it completely.
Step #2: Remove the Cartridge
With the help of needle-nose pliers, carefully take out the retaining clip that secures the cartridge in place. Once the retaining clip is removed, simply pull the cartridge upwards to detach it from the faucet assembly.
Step #3: Replace the O-rings
Begin by removing the spout from the faucet assembly. Then, proceed to cut out the old O-rings that are no longer functional. Before installing the new O-rings, ensure to coat them with plumber’s grease that is both heat-proof and non-toxic for optimal performance.
Step #4: Replace the cartridge
When selecting a new cartridge for replacement, ensure that it matches the length of the old cartridge. Additionally, pay attention to the alignment of the stem ends, as they need to match for the handle to reattach properly.
Step #5: Reassemble
Leaky Compression Faucet Repair
Step #1: Remove the Handle
To access the handle, gently pry off the cap using either a screwdriver or a knife. Once the screws holding the handle in place become visible, proceed to unscrew and remove the handle from the faucet.
Step #2: Loosen the faucet stem
Use a crescent wrench to loosen the packing nut, and then proceed to loosen the faucet stem using an adjustable wrench.
Step #3: A new seat washer
Remove the rubber washer located at the bottom of the stem and replace it with a new one. Before installing the new washers, apply a layer of heat-proof and non-toxic plumber’s grease to ensure smooth operation.
Step #4: Replace the O-ring
Detach the stem from the packing nut and swap the existing O-ring with a new one, ensuring it is the correct size (ranging from 3/8″ to 5/8″). For smoother functioning, coat the O-ring with plumber’s grease before reassembling.
Step #5: Repair the retainer
Locate the washer within a recessed and circular retainer disk. If you notice any damage to the retainer, it may necessitate the replacement of the retainer ring with a new one.
Step #6: Replace the seat
If the leakage persists, it’s possible that the retainer seat is pitted and needs to be replaced to resolve the issue.
Leaky Ball-Type Faucet Repair
A ball-type faucet can be intricate with numerous small parts, making it challenging to pinpoint the exact cause of the leak. To simplify the process and ensure effective repair, a viable solution is to replace all the parts with a new faucet replacement kit. This way, you can ensure a comprehensive fix for the issue.
Leaky Ceramic Disk Faucet Repair
Step #1: Remove the handle
Gently push the faucet handle backward to reveal the set screw. Once visible, use a screwdriver to unscrew and remove the handle from the faucet assembly.
Step #2: Cylinder removal
Begin by removing the escutcheon cap, and then proceed to unscrew the mounting screws that hold the disk cylinder in place. Once the screws are removed, carefully take out the cylinder from the faucet assembly.
Step #3: Replace neoprene seals
Employ a screwdriver to lift out the seal from the cylinder. To clean the openings on the cylinder, utilize vinegar and a scouring pad, ensuring a thorough cleaning. Rinse the cylinder well after cleaning. Finally, replace the neoprene seals for proper functioning.
Step #4: Reassemble and Test
Proceed to reassemble the faucet, taking care to do so meticulously. When turning the water back on, do it slowly and gradually to avoid any risk of fracturing the delicate ceramic disk during the process. This cautious approach will ensure the successful restoration of your faucet without causing any damage.
How to Fix a Leaking Kitchen Faucet with Two Handles
Step #1: Find the leak
Are you experiencing water dripping from either the handle or the faucet? Also, take note if the water is running cold or hot to help diagnose the issue accurately.
Step #2: Remove the handle
Based on the style of handles, knobs, levers, or similar components, locate the screw that secures them in place. You can do this by gently prying off the decorative cap or pushing the handle backward. Once you find the screw, use a screwdriver to unscrew and remove the handle from the fixture.
Step #3: Remove the Stem
Begin by loosening the nut that connects the handle to the stem. Once the nut is loose, carefully remove the faucet stem from the handle. This will allow you to proceed with any necessary repairs or replacements for the faucet.
Step #4: Repair the Cause of Leakage
Now, at this stage, you have the option to replace the rubber washers or O-rings, or both, depending on the specific type of faucet you are repairing. Assess the condition of the components and make the appropriate replacements to ensure the faucet functions smoothly.
Step #5: Reassemble
Wrapping Up
By following these straightforward guidelines for fixing your leaky kitchen faucet, you can conserve water and avoid incurring a plumber’s bill. However, if the issue persists despite attempting these steps, it could indicate a more serious problem, and it may be best to reach out to a professional plumber for assistance.


